Recently I was introduced to the wonders of Visual Studio Team Services (VSTS) and its ability to create and automate builds and deployments . As I have not dabbled in web development for some time this helped me tremendously as I needed to make some changes to an existing Node.js + Grunt application and deploy it. Inspired by my colleague’s blog post about how to set up a CI/CD pipeline for an Angular application using Azure, VSTS and GitHub I decided to make this blog post of my own to share how to do this for a Node.js + Grunt web application.
In this post I will primarily focus on how to use VSTS to create and automate builds and releases. We will be using Microsoft Azure to host our web application and to setup our continuous deployment with. We will also be integrating VSTS with GitHub so that we have a repository to create a build and release from. I will assume that you already have an existing web application built on Node.js and Grunt and that this is already hosted on a GitHub repository. A basic understanding of how Azure and VSTS works is also preferred as I will not delve too deep into these.
Creating your Azure Web App
If you don’t have one already, set up a Microsoft account and log on to portal.azure.com. Here we will create a new web app hosting enviroment. From the main screen/dashboard, click “New” (+) -> “Web + Mobile” -> “Web App”. If you don’t have an Azure subscription you’ll be prompted to make one. Once that’s done, continue setting up your Azure Web App by filling in your app name, selecting “Subscription” and “Resource Group”. I will be naming my app nodegruntexample. Hit “Create” and you’re done with the Azure part.
Setting up your VSTS account
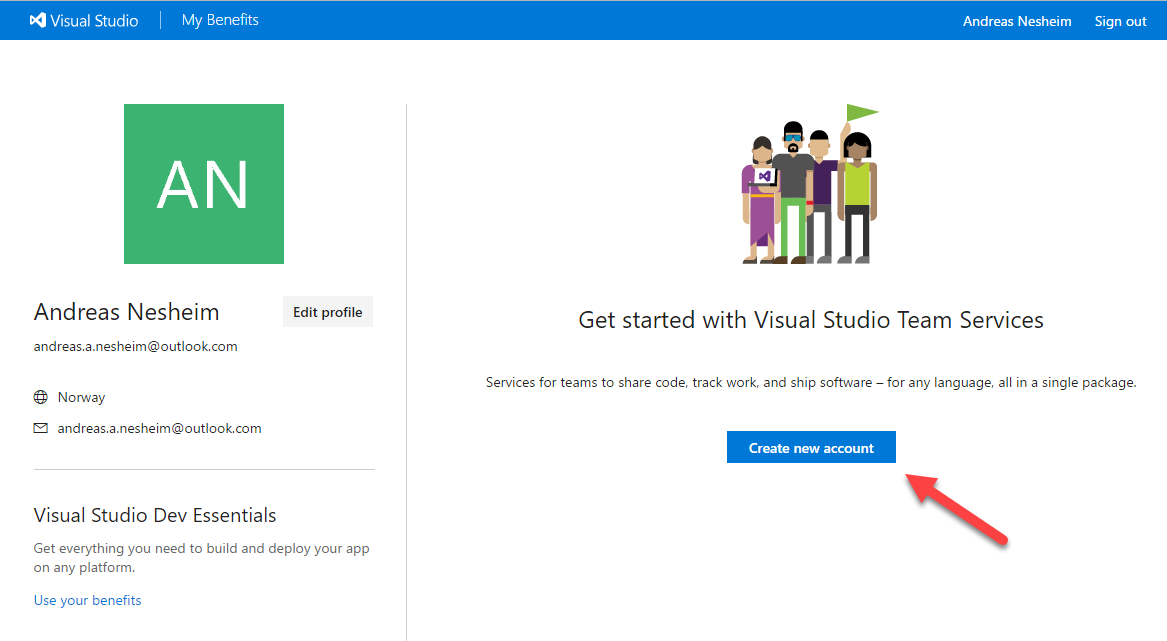
Log on to visualstudio.com with the same account you used for Azure. From your account page, click “Create new account”.
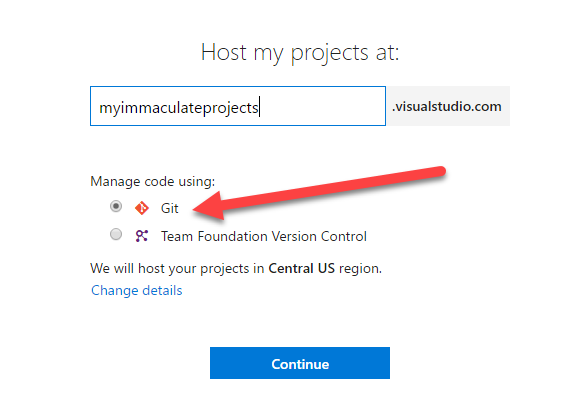
Pick a name for your account and select “Git” as source control. If you want to change the default hosting region or your default project name, click “Change details”. Otherwise you’ll have to settle for the default project name MyFirstProject.
Setting up your build definition (Continuous Integration)
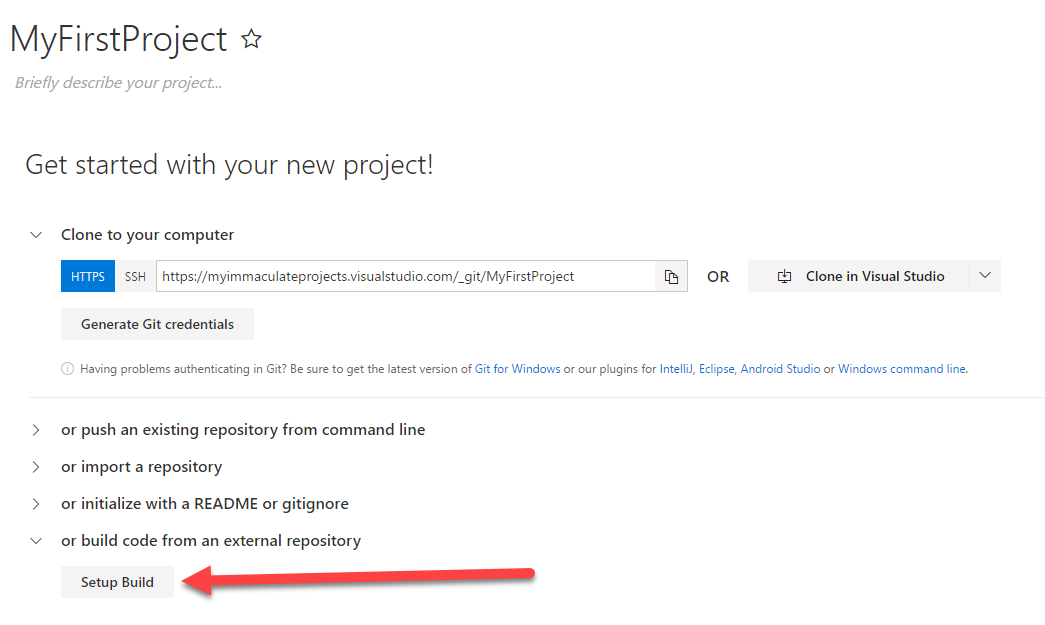
Once your project space is set up, let’s create a build procedure. On the following screen, click “build code from an external repository” as shown in the following screenshot.
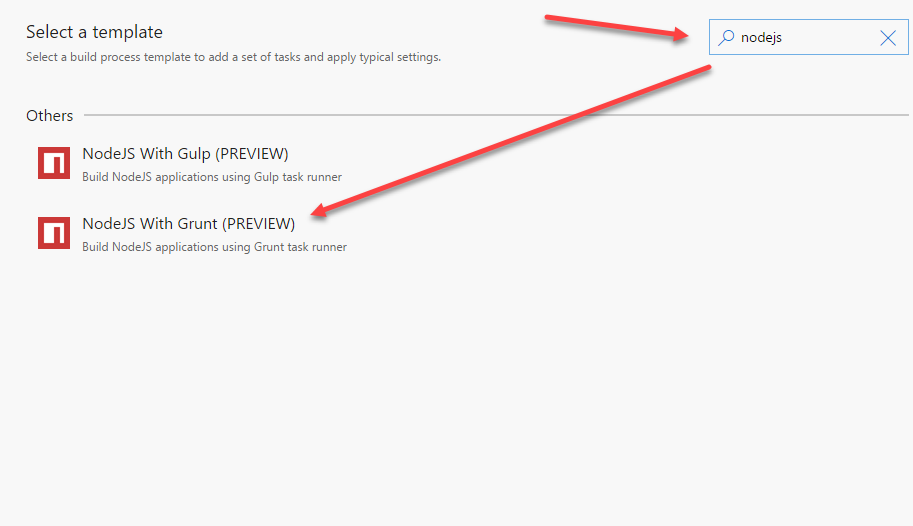
On the following screen, click “New definition”. You will now be able to select from a list of predefined build definitions. Lucky for us, there’s already a definition for NodeJS + Grunt. Just search for “Nodejs” in the search area and select “NodeJS With Grunt”.
The different steps for the build process is listed on the left. As you can see we have the “npm install”-command to install our packages and our additional grunt commands.
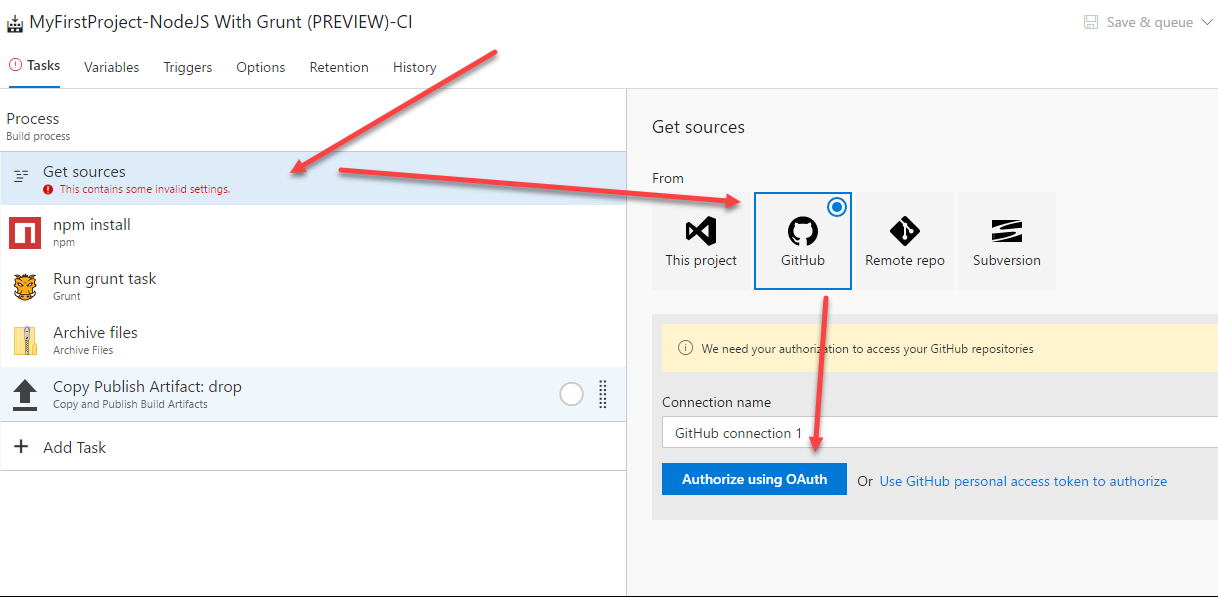
Before we start configuring our Node and Grunt tasks we need to select what repository to generate our build from. From the build tasks, select “Get sources”. Select “GitHub” and click “Authorize using OAuth”. You might have to allow pop-ups from your browser for the prompt to show up.
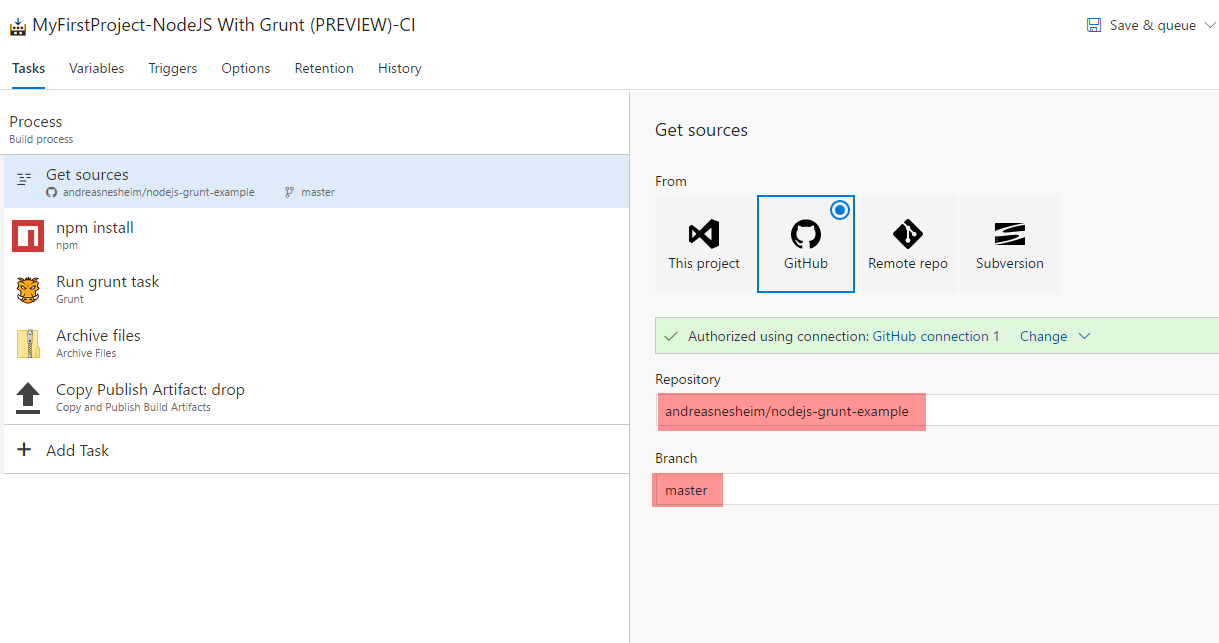
Once this is done, select your repository and what branch to get your code from. If you’re planning on using this build definition for your production release, the master branch would be the selection of your choice. If you have a testing environment you could point this to the branch you use for development or testing to e.g. continuously push out the latest changes to your testers. For this example, I’ve selected the “master” branch.
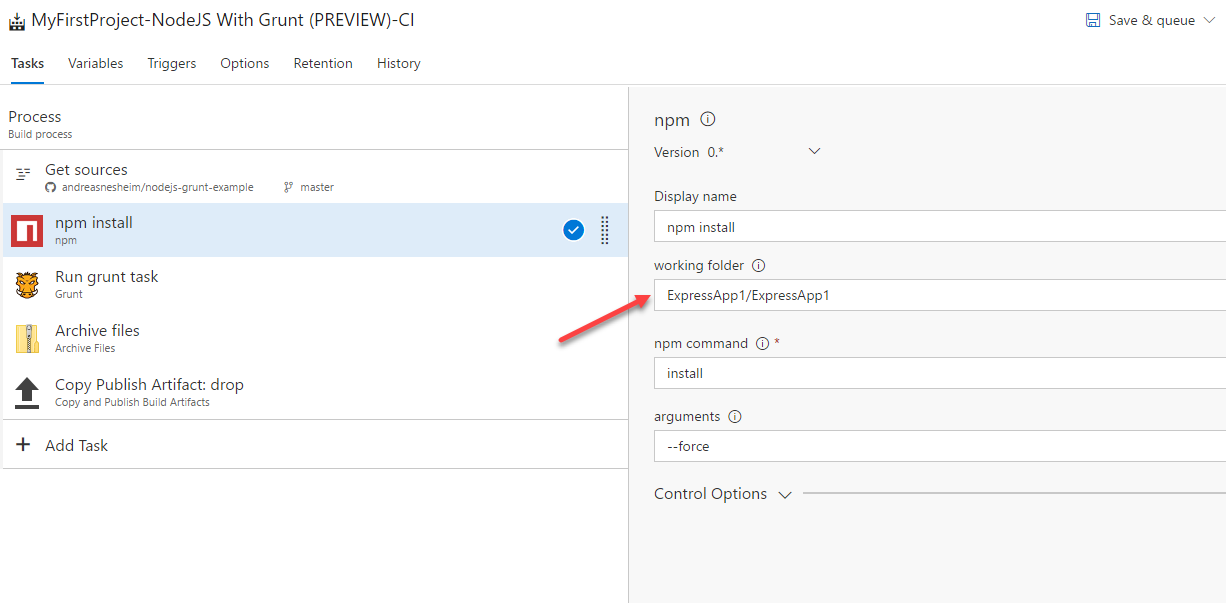
Next, select the “npm install” task. Make sure to set “Working folder” to where you would normally run the “npm install” task. The other default settings here should be fine.
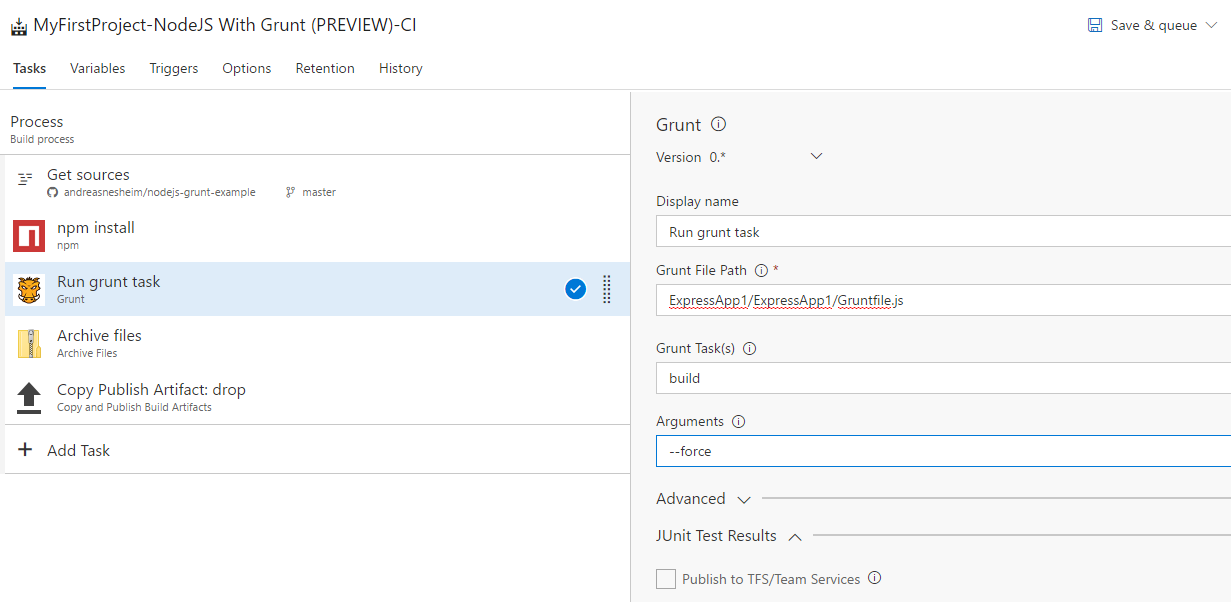
Select “Run grunt task” and make sure “Grunt File Path” actually points to the location of your Gruntfile. Under “Grunt Task(s)”, add your optional tasks to run. I’ve added the “build” task, just in case. Under “Arguments” I’ve added the “–force” argument because of some strict linting I had to bypass.
Next, select “Archive files”. Under “Root folder (or file) to archive”, select the folder that you want to archive from. Normally this will be the folder where your compiled files are located, e.g. a “dist”-folder.
Now save your build from the “Save & queue” dropdown in the top right. No need to queue a build as we are nearing the essential step that will save us this trouble.
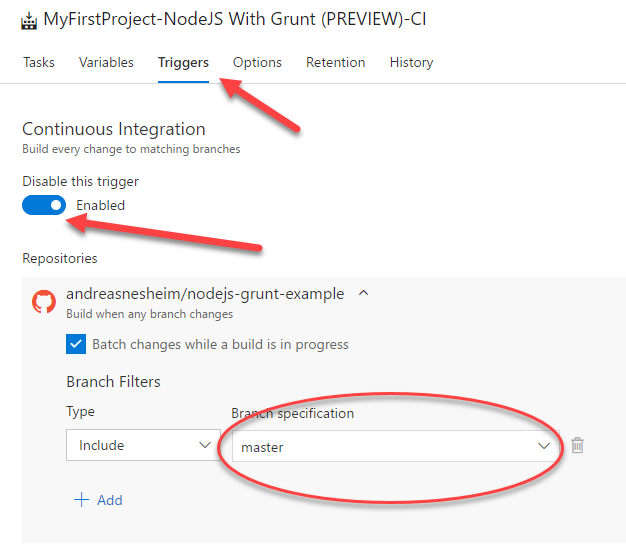
The last, but most important step, is to enable Continuous Integration. This is done under “Triggers”, as shown in the screenshot below. Enable “Continuous Integration” and select a branch under “Branch specification”. When a commit is pushed to this branch, it will trigger a build which you in turn can release – manually or automatically.
Build status badge
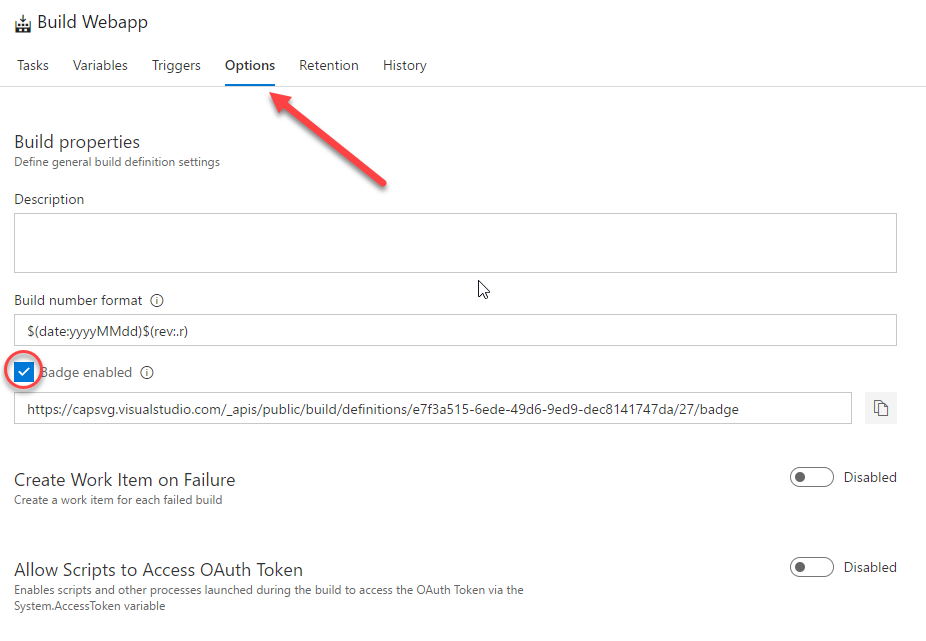
Have you seen those GitHub repositories with the little “badge” that tells you the status of the last build? VSTS offers this functionality by providing a HTML link you can copy into your GitHub repository. Select “Options” and check “Badge enabled”. Copy the link into your README.md and the badge will reflect your latest build status at all times.
The badge, in all its glory (if your build is successful):
![]()
Setting up your release definition (Continuous Deployment)
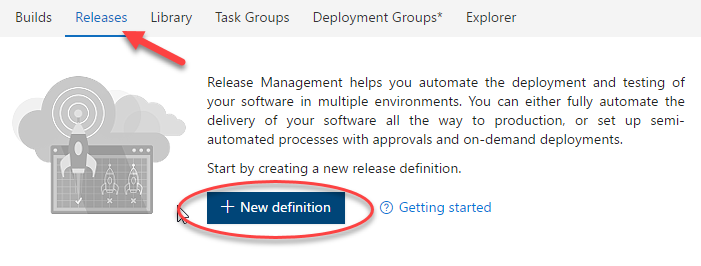
Compared to setting up continuous integration, this step will be a walk in the park. After saving your build, head on over to “Releases” and create a new release definition.
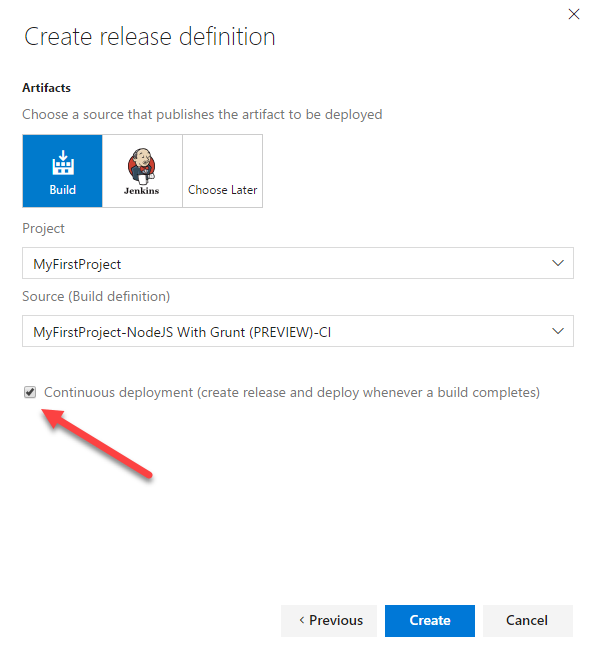
From the popup select the first template, “Azure App Service Deployment”. If you scroll down you’ll notice there’s another template called “Node.js App to Azure App Service”, but to my knowledge there is no difference between these two options seeing that Azure App Services support Node.js out of the box. Hit “Next” and select “Build” under “Artifacts” and your project and build definition from the previous steps. Last, but not least, hit the checkbox for “Continuous deployment” and click “Create”.
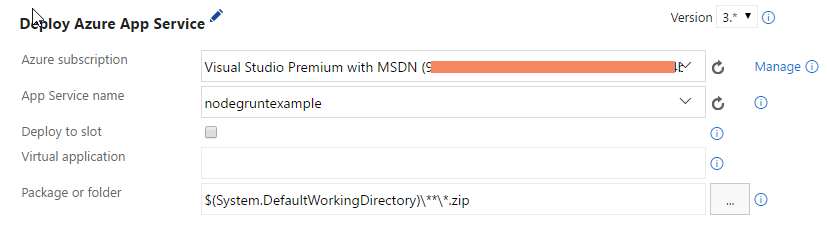
From the next screen, select your “Azure subscription”, authorize it and select your Azure Web app from “App Service name”. Now save it and you’re good!
The next time you push to your master branch, VSTS will create a build and automatically deploy it to Azure.
Final words
I’ve grown really fond of Visual Studio Team Services after discovering its true potential and I find myself trying to automate the smallest task now. I hope you’ve learned something from this blog post and I encourage you to play around with VSTS and check out the other predefined build templates.
It’s a shame you don’t have a donate button! I’d without a doubt donate to this excellent blog!
I guess for now i’ll settle for book-marking and adding your RSS feed to my Google account.
I look forward to brand new updates and will talk about this
website with my Facebook group. Talk soon!