In my previous post, I started on replicating the UI of the Foodora app using .NET MAUI. In this post I will continue that journey by replicating the next screen of the app, after you’ve clicked the “Restauranter” (Restaurants) section.
Preface
When testing this on Android as of Preview 14, I hit some issues when setting the item template for some of the views. The app wouldn’t start on Android and the rendering was very off on iOS and Windows. Therefore I wasn’t able to provide full screenshots of the final implementation. If you want to test the code (provided at the bottom), comment out the item templates or test it out on Windows. The template may be a bit off, but at least it will start. UPDATE: As of RC1, this seems to have been fixed.
Breaking it up
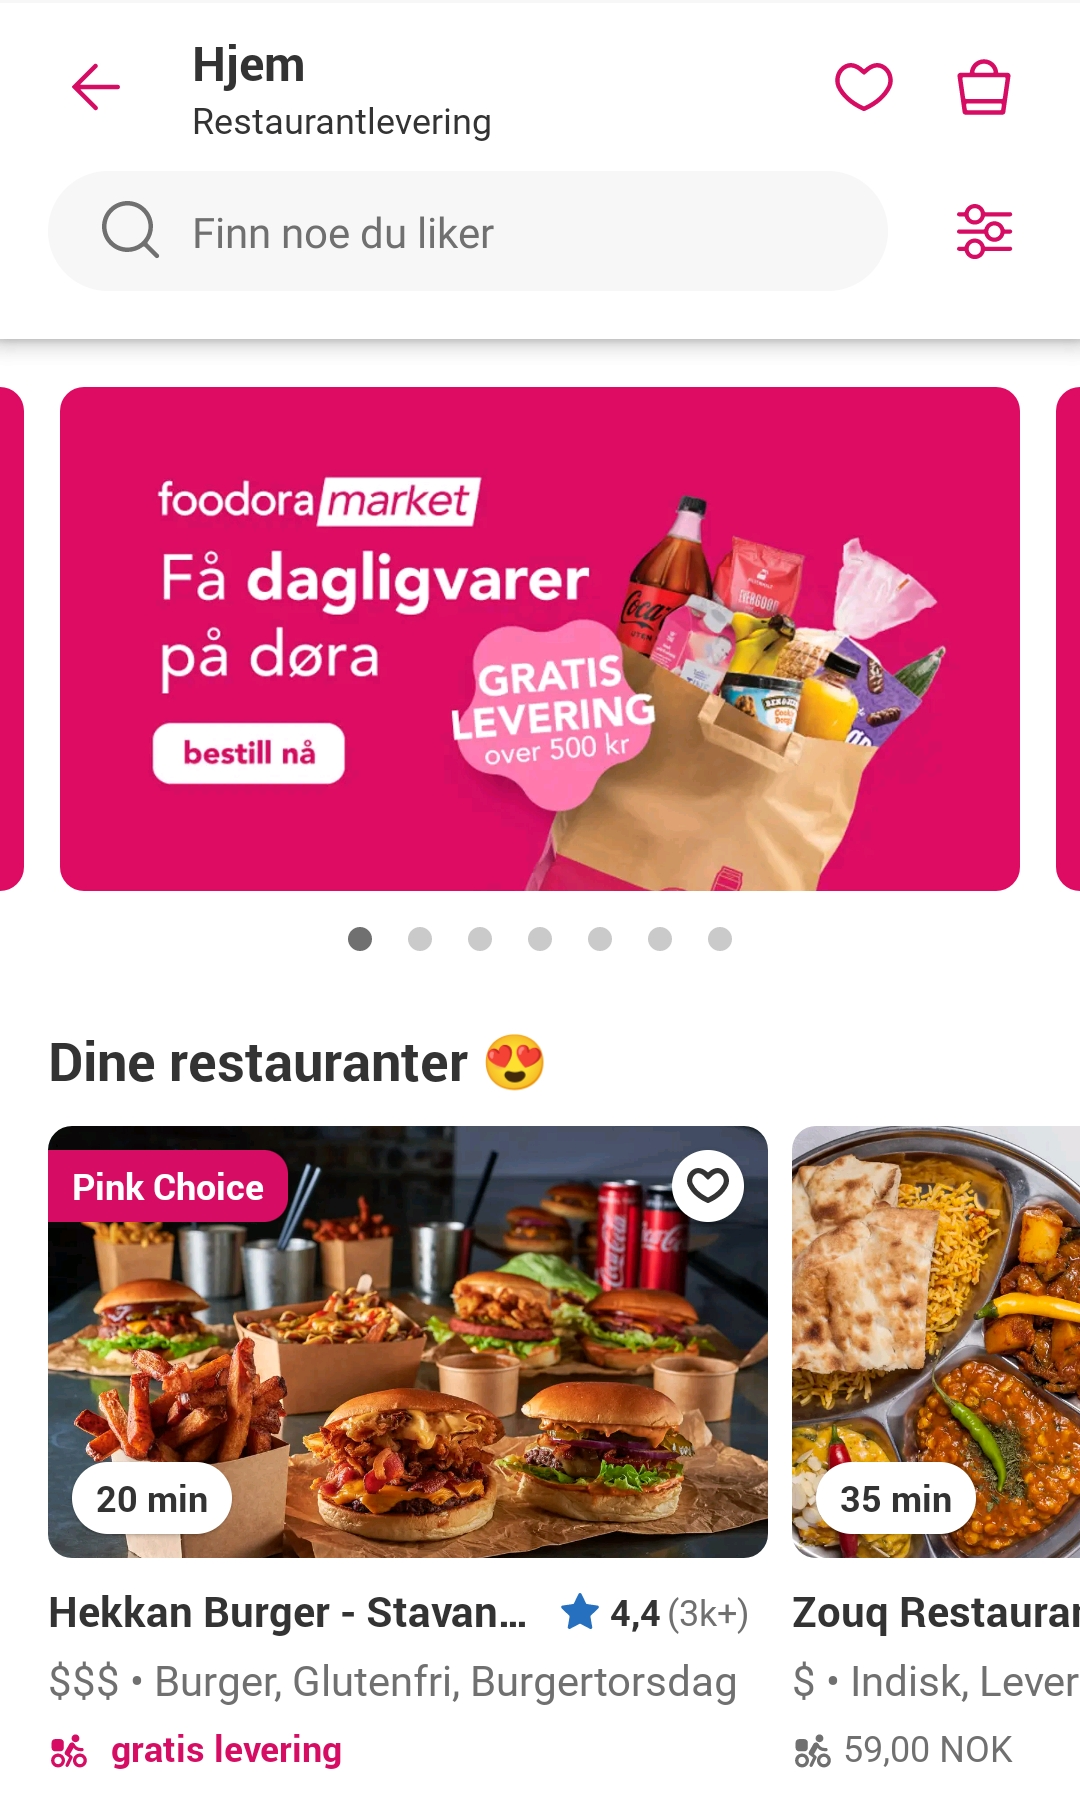
As with the first part, we’ll start off by setting up a Grid for the different sections:
Title section
The title section is very similar to the previous page, so I won’t go into much detail on the implementation here. The only difference here is that the menu button is swapped with a back button and some of the text is different. Here is the full XAML for the title section:
Search section
The search section is also very similar to the previous one. The only difference is the placeholder text in the search field and the addition of a filter button on the right.
Divider section
In the design, right below the search section there’s a shadow to divide the top section from the rest. I tried some different strategies for achieving this, but I landed on this “hacky” solution where I added a shadow to a BoxView. Before this I tried wrapping the top section into a StackLayout and adding a shadow to that, but that only seemed to add a shadow to each of the individual child elements inside of it.
Carousel section
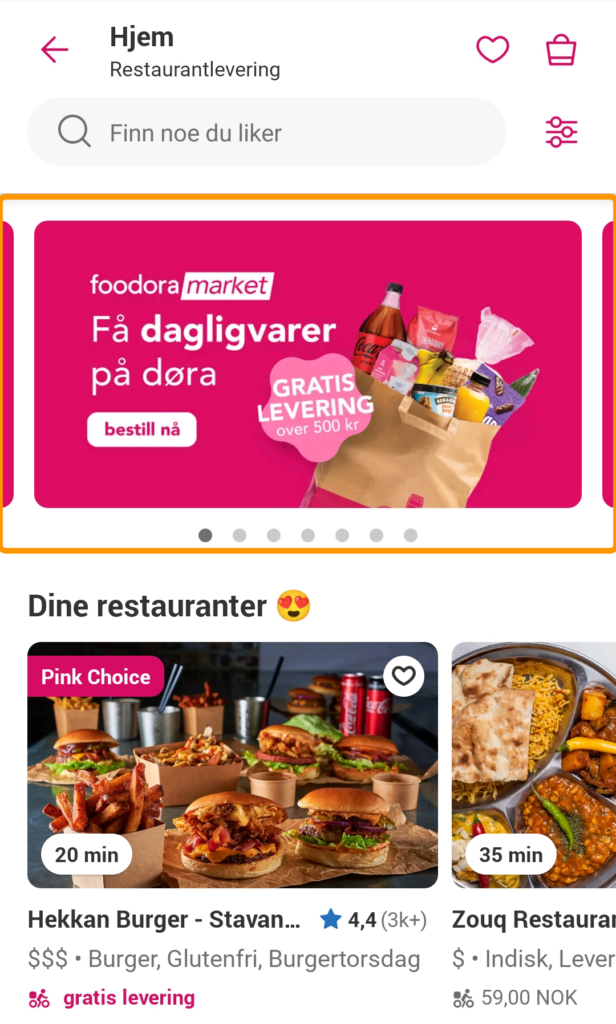
For the carousel section I used a CarouselView with an IndicatorView connected to it. The IndicatorView are the small ellipses below the CarouselView that indicates which item in the list is being displayed.
The item template for the CarouselView consist of a Frame with different child elements. I’ll try to break these up as well.
I use a Grid inside the Frame so that I can set the illustration to the right as a background image. Other than that I use a combination of StackLayout-s and Label-s to achieve the layout. One thing to note is how I use a Polygon to achieve the parallelogram behind the text “market”.
For the sake of this example I hardcoded a list as the items source for the CollectionView. The easiest way to do this was to add dummy items directly into the XAML.
“Your Restaurants” section
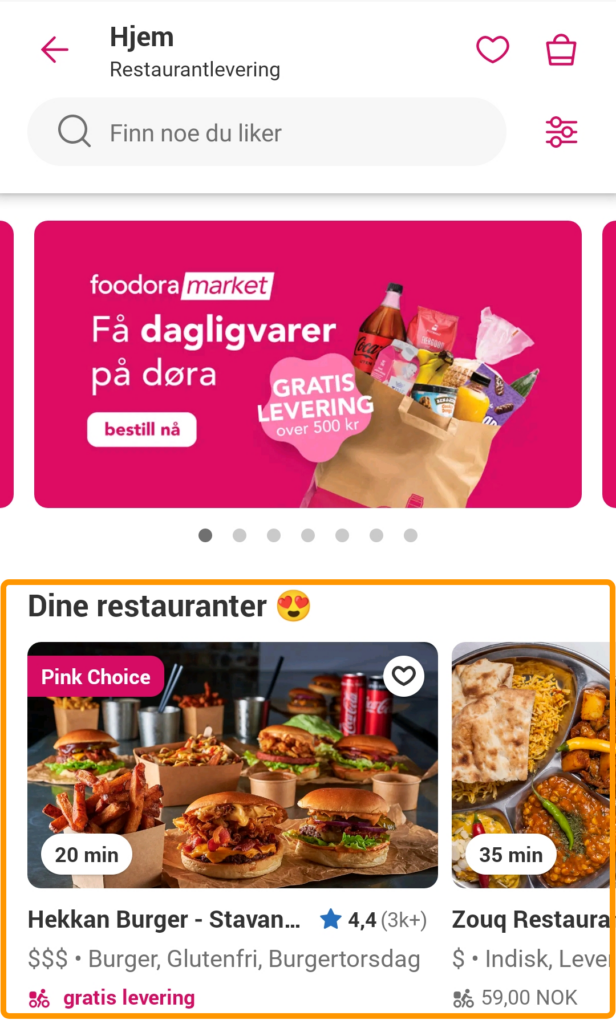
The section named “Dine Restauranter” (translation: Your restaurants) consists of a Label as the header and a horizontal CollectionView.
I’ll divide the item template for the CollectionView into two sections: the image section and the info section.
The image section is somewhat like the one for the carousel: an image background with some labels on top of it, only this image fills the whole template. I made the heart icon an ImageButton, since it seems like the user should be able to set the restaurant as favorite directly from the list. I had to hardcode a lot of the width values to be able to scale the image correctly and to position the text labels without too much work.
The info section is a collection of labels and some icons with different styling.
And we’re done! That’s the whole second page of the Foodora app.
Wrapping up
I tried to test this design on multiple platforms and on both device and simulators. The layout works pretty good on Android, except for a bug with the item template, but it straight up doesn’t work on iOS. There was a huge whitespace in the middle of the screen, and on Windows the background color for the item template didn’t work. So there still seems to be some kinks to be worked out, but other than that I am very pleased that I am able to do this stuff in .NET MAUI now.
Anyway, that’s it for this one! The next part will probably the list page for the various dishes for a certain restaurant. I’ve updated my GitHub repository to include this second page.
1 thought on “Replicating Foodora UI in .NET MAUI – Part 2”